Retail
Fine-Tune Your Beginner Archery Lessons
Archery lessons should be a fun and informative experience. Keep your lessons fun and productive to encourage repeat customers.
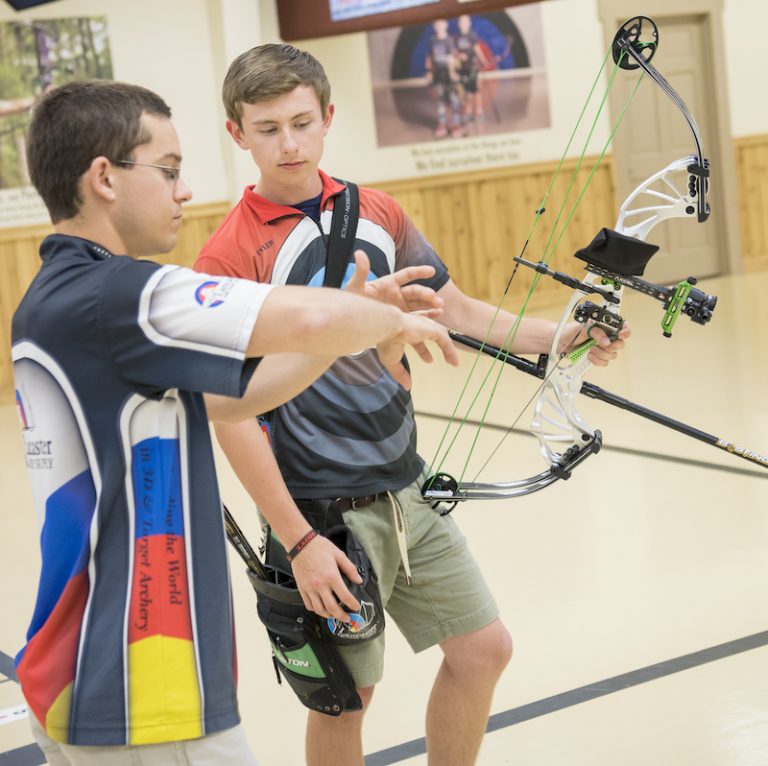
Photo Credit: ATA
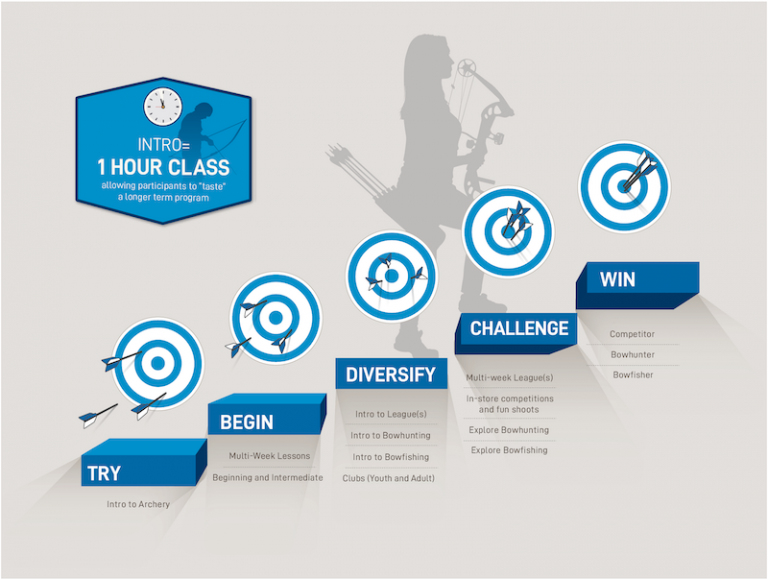
“Intro to Archery” classes are designed to cover the components of archery and basic technique in one hour. The instructor demonstrates the sport’s benefits and generates excitement so that new archers take the next step and register for additional lessons. Incentives, games, and hands-on experience help ensure participants return for more.
When the archer signs up for an extended curriculum, the fun really begins. Instructors often explain each part of the shooting process step-by-step and make sure the archer is using the proper technique. Lessons are more fun and engaging when instructors provide a progress checklist and offer incentives for completing each task. The best classes offer individual attention while also giving the archers time to practice.
Ready to start offering classes at your shop or range? Here are a few ideas to get started.

End your class with a fun archery game. Photo Credit: Pacifica Archery
During the introductory lesson, the archery instructor should teach the fundamentals of proper form in a brief 15-minute overview. Remember to cover the following:
- Range safety rules and whistle and verbal commands.
- Equipment overview and the dangers of dry-firing the bow.
- Proper bow fit. For all archers, pay attention to where the bowstring is hitting their face. The bowstring should be touching their nose when they’re at full draw. If the bowstring stops short of the archer’s face, the bow’s draw length is too short. If they can pull the string past their face, the draw length is too long.
After the archers learn the safety rules and fundamentals, open the range for practice time. Give the archers 30 minutes to practice on the range, offering guidance as needed.
End the class with a 15-minute activity. Set up balloons or zombie targets, or have the archers shoot for a reward. Fill the balloons with confetti if you have time for the clean-up. Rewards can be candy or other small prizes. Attach photos of four different prizes to the target, and ask the archers to aim for the prize they want. For more ideas, ATA members can review the sample class outline on the Resource Website.

Concentrate on each component of the shot process during extended lesson programs. Photo Credit: ATA
During an extended curriculum class, the instructor will spend more time on each technique. Begin with teaching the archers where to place their fingers on the release or finger tab and how to draw the bow. Make sure the archers are pulling the bowstring straight back, keeping the line even with their forearm. Then, teach the archers how to keep their bow arm straight without locking their elbow. Make sure the grip is resting between their thumb and first finger, with their other three fingers relaxed and away from the bow. Then, work on their anchor point and release. Remind participants to draw the arrow back to the same place every time to keep the shots consistent.
Focus on mechanics and accuracy, rather than score. Encourage archers to get a feel for technique over hitting the target. If they are focused too intently on the bull’s-eye, remove the target and have them shoot blank bale until they’re comfortable. This allows participants to work on their technique without worrying about score. They can also discover if their arrows are landing in the same spot. For a beginning archer, the goal is to consistently land their arrows in a cluster.
Work on a couple of the steps each week. If participants perfect one technique at a time, they’ll have all the pieces for a perfect shot when they put it together. During the open practice session, work with the archers that need extra help. Repeat the steps until they’ve mastered the component of a key area, and then encourage them to move on to the next.
The Explore Archery guide for instructors contains an overview on the “Steps of Shooting” (page 28) and an outline for multiple class structures, including a six-week camp (page 165).

Create a checklist so archers can track their progress. Review our class progression guidelines for reference. Photo Credit: ATA
Create an archery fundamentals checklist. Have the archers record their progress as they develop each technique. When the checklist items are complete, use this checklist as a “graduation certificate.” Now they can move on from introductory lessons. Reward each completed milestone with different incentives, like snacks, discounts on gear, or gift certificates to your shop. This will give archers a measurable goal and a way for them to track their progress. Use this process during your camps, extended classes, or private lessons. Only check off the skill if the archer has demonstrated a reasonable ability. This may be more difficult to implement in group classes. But in private lessons you can focus on trouble spots until they’ve mastered the skill. Review the ATA’s guideline for program progression on the Resource Website.
It’s simple: Create checklists, provide incentives, and end each lesson with a fun activity. This class structure is a great way to attract new archers and generate revenue for your shop. Develop personal connections with your archers and provide individual coaching lessons. Let each archer practice at their own pace, and offer the necessary guidance.
And have fun! If you approach your lessons with the joy of teaching, your students will reciprocate with the joy of learning.
Questions? Contact Nicole Nash, ATA’s manager of range and retail programs, at nicolenash@archerytrade.org.

WE ARE HERE TO HELP THE INDUSTRY, TO HELP INDIVIDUAL BUSINESSES GET THE MOST OUT OF THE INDUSTRY, AND TO HELP YOU.