Retail
Film a Commercial for Your Business: Part 2
Preparation is important, and execution turns ideas into tangible products. Learn how to use those principles to produce quality videos.
Photo Credit: ATA
In Part 1 of this series on filming DIY commercials, we discussed why ATA members should create video ads, how to write scripts, and where to find gear and software. In Part 2, we’ll share production, editing and advertising tips for your commercials. Let’s dive in.
Your script and storyboard dictates your production-day schedule. Walk through the shots you need and create a shot list, which details the props and people needed for each shot. Designate a director to give day-of instructions. That person should organize the production day to group and record similar shots and scenes to streamline the process. The director must factor in time for breaks, retakes, interruptions and unforeseen distractions.
You need good light to shoot quality video, so plan accordingly. The best time to shoot outdoors is late in the day. When the sun is low in the sky you’ll get more vibrant colors without harsh, direct sunlight. For indoor shots, consider using a reflector or extra lighting. Charge batteries and pack accessories in advance.
Be sure to communicate when and where to meet your “talent” and behind-the-scenes staff or volunteers. Also devote time and thought into choosing your talent. They must be relatable and engaging, and use correct archery shooting form in every shot. Your credibility is on the line. They must also be able to speak their lines smoothly and comfortably without reading them.

Getting action shots requires steady movement from the videographer. If you think you're going slow, go slower. Photo credit: ATA
Set up your gear and run a few test shots on production day to ensure everything’s working correctly. Test shots answer questions like “Is the microphone on?” or “Is there a card inside the camera?” You might be tempted to hold your video-recorder, but don’t. A tripod ensures steady shots and sharp focus, which makes videos easier to watch.
When recording, zoom and turn the camera slowly so your viewers don’t get queasy from motion sickness when watching the final product. Also be sure the scene is in focus. Nothing ruins a shot faster than unfocused subjects. It’s OK to review your shots on site and record them a second time to ensure quality and accuracy. Listen for background noise and postpone shots to let trains, sirens or other sounds pass, especially when using your camera’s internal mic. Wireless mics don’t pick up as many nearby sounds.
Shoot extra “B-roll,” too. B-roll is supplemental footage used for cutaways from the main shot during editing. Good B-roll helps tell the story. For example, if your video shows an instructor demonstrating releases, take time to record brief closeups of each release, and weave them into the video so viewers can see how they look. Slow motion B-roll of archery makes great footage. Record people shaking hands, walking to targets, and nocking or releasing arrows. Then slow the scene in post-production for unique B-roll footage. Learn more about B-roll here.
At the end of your production day, clean up the area, put away all gear, and transfer your video clips to a computer or external hard drive for safe-keeping.

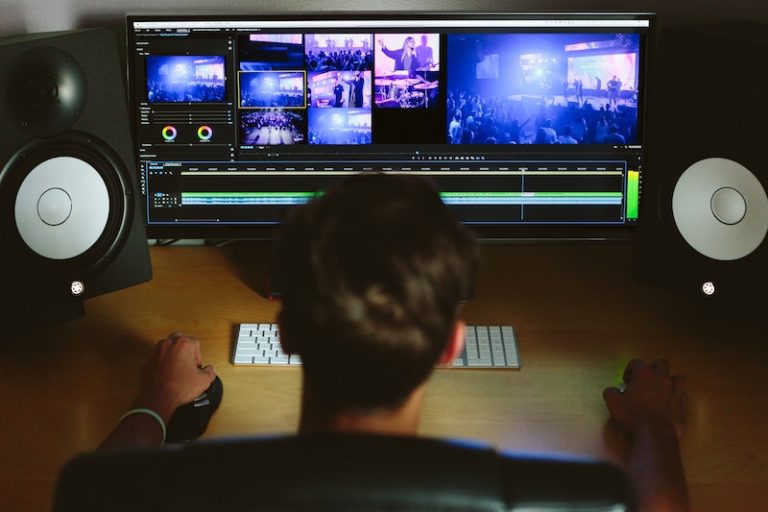
Edit music into your video to give your viewers a cinematic experience. Photo Credit: Unsplash
Before editing, label and organize the footage on your computer. Some people keep clips in chronological order, while others like to separate clips into scenes or categories. Do whatever makes sense to you.
When editing, use special effects and sound recordings in your software program to create your video or commercial. Edit out boring, repetitive or unwanted parts of each video, and add text or filters as needed. Don’t overdo video effects and transitions because they can degrade your video’s professionalism. Plus, viewers prefer standard hard-cuts, rather than fades, blurs and spinning transitions.
If you have time to color-correct your production, it adds a nice touch. Most programs let video editors “dim” bright or overexposed shots or make blue florescent lighting appear more yellow. Color corrections make videos more realistic. Adding background music also gives videos personality. Use slow music to create a calming mood or fast music to ramp up viewers. Pick a soundtrack that complements visual scenes. Respect musicians’ copyrights. You can also buy royalty-free music, which lets you buy a music license and use the music as much as you’d like.
For extensive video-editing tips, read Premium Beat’s article “Professional Video Editing Tips and Techniques.”
Finish your video and export it for the web. To maintain high-quality video, export it using the default export setting in your editing program. It should be 1080/60p, which works great for online videos.
Before uploading your video to your website or social-media account, name it and write a short description to introduce it to consumers. Use keywords to improve “search engine optimization,” a marketing tactic that makes your content more visible to consumers. Keywords are those your customers often search for, such as “bows,” “arrows,” “archery,” “bowhunting,” “archery classes,” and your town or city’s name. Also use hashtags, and include your business’s name in the description. Learn more about SEO techniques here.
Upload the video and set it to “public” so your followers can share it for additional promotion. If the video’s a hit, brainstorm more ideas. You can highlight different aspects of your business with each video. As you make more videos or commercials, you’ll become more efficient at producing them.
If you have questions or need more information, contact Scott Einsmann, ATA’s digital manager, at (866) 266-2776, ext. 114.

WE ARE HERE TO HELP THE INDUSTRY, TO HELP INDIVIDUAL BUSINESSES GET THE MOST OUT OF THE INDUSTRY, AND TO HELP YOU.